
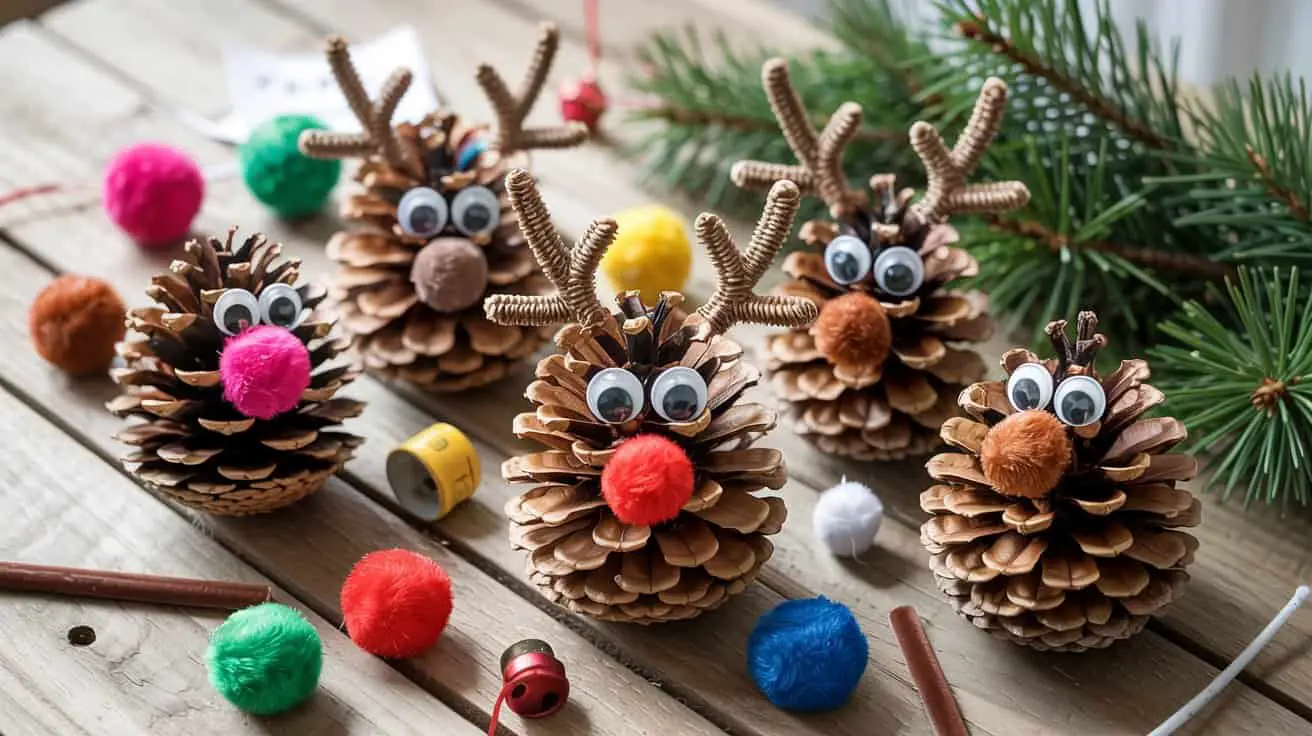
There’s something so magical about Christmas crafts that start with a simple pinecone. Kids pick them up on walks, gather them in pockets, forget them in backpacks, and suddenly—over one cozy afternoon—they become ornaments, characters, and tiny pieces of holiday charm. Pinecone reindeer are one of those crafts that feel like they were made for the Christmas season. They’re cute, quick to assemble, and perfect for little hands, whether you’re doing a sleepover craft, a classroom project, or a quiet weekend activity at home.

What makes this craft extra calming is how tactile and natural it is. Kids get to feel the textures of the pinecones, twist pipe cleaners into antlers, press on little noses, and bring each reindeer to life with its own personality. No complicated steps. No intense setup. Just warm Christmas vibes, soft giggles, and nature-inspired creativity.
This easy pinecone reindeer craft works beautifully for toddlers (with some help), preschoolers, and older kids who want to make something sweet for the tree. They also make adorable handmade gifts for family members, especially when paired with a cute name tag or tiny scarf.
Here’s how to make your own little herd of reindeer.
Materials You’ll Need
Click image to view on Amazon
• A few pinecones (any shape or size)
• Googly eyes
• Red pom-poms (for Rudolph) or brown pom-poms (for regular reindeer)
• Brown pipe cleaners
• Hot glue or strong craft glue
• Optional: felt scraps for scarves, mini bells, ribbon, glitter, or tiny twig accessories
Everything here is simple and inexpensive—most families and teachers already have these in a craft drawer.
Step 1: Prepare the Pinecones
Choose pinecones that sit upright easily. If they wobble, you can glue a small cardboard circle or wooden slice underneath for stability. Kids love picking their “favourite” pinecone, and each one turns out slightly different depending on the shape.
Step 2: Make the Antlers
Cut a pipe cleaner in half. Twist each piece into a gentle antler shape with two or three little branches. Pipe cleaners are perfect for this because they’re soft and easy for kids to bend. Glue the antlers into the top back of the pinecone.
Step 3: Add the Face
Glue two googly eyes near the top front of the pinecone. Then attach the pom-pom nose. A bright red nose instantly turns your reindeer into Rudolph, while a brown one keeps things classic. Younger kids love choosing which nose each reindeer gets.
Step 4: Add Little Details (Optional but Fun!)
Kids can glue on:
• a tiny felt scarf
• a small jingle bell around the neck
• mini twigs as legs
• glitter for a frosty look
These add that extra layer of personality without making the craft complicated.
Step 5: Display Your Reindeer
Your pinecone reindeer can:
• sit on a windowsill
• hang on the Christmas tree (just glue on a ribbon loop)
• become part of a handmade woodland village
• decorate a child’s bedroom shelf
• join a whole “reindeer family” craft scene
If you’re hosting a Christmas sleepover or classroom activity, kids can each make one and line them up for a cute group photo before taking them home.
Why This Craft Works So Well for Kids
• It’s calming and sensory-friendly
• Minimal mess
• Uses natural materials
• Requires only a few steps
• Works for mixed ages
• Encourages creativity and storytelling
Kids often end up naming their reindeer, making tiny hats, or adding extra “character details,” which turns a simple craft into a whole imaginative moment.