
There’s something magical about Christmas crafts that come straight from nature. No glitter explosions, no fancy tools—just twigs, twine, and a few quiet moments spent creating something beautiful with your hands. This little rustic twig reindeer ornament is one of those crafts you can make on a slow afternoon with kids, during a cozy classroom activity, or even as a peaceful “me-time” project when you want to escape the holiday chaos.

Click image to view on Amazon
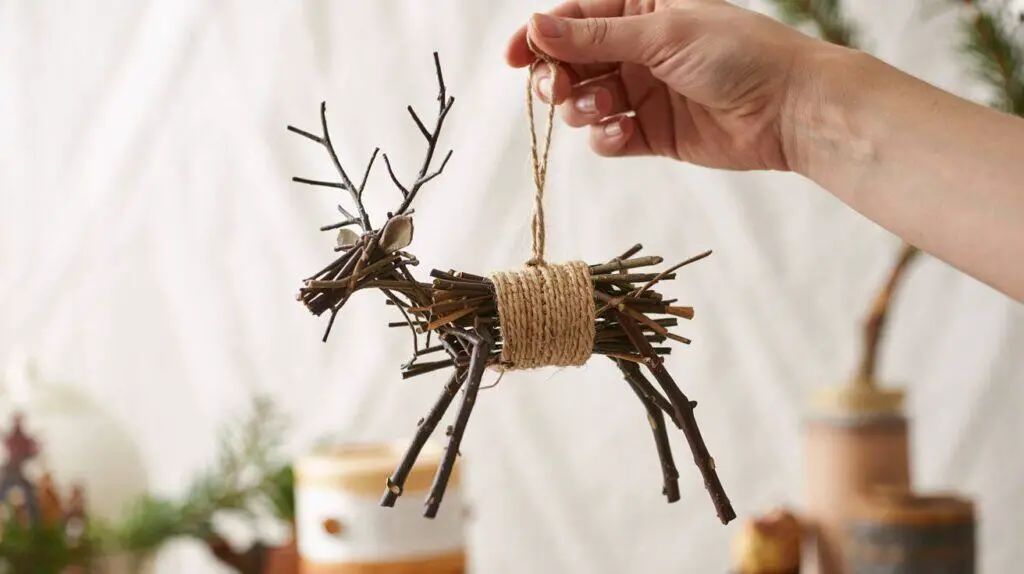
The charm of this reindeer is in its simplicity. It looks like something you’d find in a tiny woodland cabin or hanging from the branch of a minimalist Scandinavian Christmas tree. And the best part? You can make it using materials right from your backyard.
Below is an easy step-by-step guide to create your own cute twig reindeer ornament.
What You’ll Need
- Small twigs or thin branches (various lengths)
- Jute twine or natural string
- Craft glue or a hot glue gun
- Scissors
- Optional: tiny pine sprigs, bells, or cinnamon sticks for decorating
Step 1: Choose Your Twigs
Walk outside and gather a handful of twigs that are straight, sturdy, and smooth.
You’ll need:
- 1 longer twig for the body
- 2 short twigs for legs
- 1 small twig for the neck
- 1 medium twig for the head
- 2 small branching twigs for antlers
This is a great opportunity for kids to explore nature and practice observation skills—look for twigs that naturally resemble the shape of a deer.
Step 2: Build the Body
Lay the longest twig down first.
Glue the two shorter twigs to the bottom of the body twig, forming the legs.
Keep everything simple and rustic—slight angles are fine and make it look more handmade.
Let the glue dry for a minute before moving to the next step.
Step 3: Attach the Neck and Head
Glue a small, straight twig on top of the body to form the neck.
Then glue the head twig horizontally at the top.
The shape should look like a gentle “L.”
Once secure, glue the antler twigs behind the head.
Choose antlers that branch nicely—they give that charming “forest creature” look.
Step 4: Wrap the Body in Twine
Take your jute twine and wrap it around the middle section of the body twig.
Keep the wrapping tight but not perfect—you want that warm, rustic style.
Tie the twine at the back and trim any loose ends.
This step adds texture, warmth, and that handmade woodland vibe Pinterest readers love.
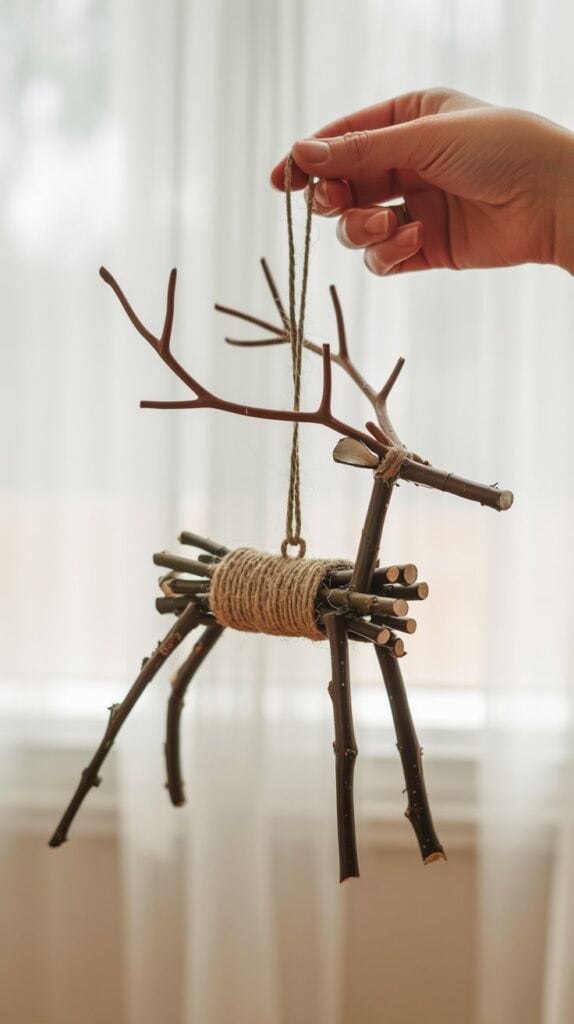
Step 5: Add a Hanging Loop
Cut a small piece of twine and tie it to the top of the reindeer’s back or neck.
This will be the loop for hanging your ornament on the tree.
You can also tie a tiny bell or pine sprig to the twine for extra cuteness.
Step 6: Optional Decorations
Keep it minimal or decorate it however you like:
- Add a cinnamon stick along the body
- Tie a mini bow around the neck
- Add a small felt nose (red for Rudolph!)
- Brush the twigs with white paint for a snow-kissed effect
Kids especially love adding personality to their reindeer.
Why This Craft Is Perfect for Christmas
This twig reindeer ornament is:
✓ calming
✓ affordable
✓ great for kids
✓ nature-inspired
✓ classroom-friendly
✓ beautiful as a gift or tree ornament
It’s also a lovely way to slow down during the busy holiday season and enjoy a few quiet minutes making something meaningful.