
Spring gardening gets a lot easier when you’re not hunting for pruners in a kitchen drawer or balancing seed packets on a windowsill. If you already have a garden shed (or one of those small yard sheds that came with the house), you’re sitting on a really useful opportunity: a dedicated spot where tools live, plans stay visible, and spring tasks feel less chaotic.
A spring “command center” doesn’t have to mean a perfect magazine potting shed. It can be a clean, practical garden building that helps you get outside faster, keep muddy stuff out of the house, and make your garden time feel calmer. This works for beginners, families, pet owners, and renters too—because a lot of the best improvements are removable, budget-aware, and more about layout than big renovations.
Below are simple, realistic outdoor shed ideas to turn your shed into a spring garden hub for tools, raised beds, and planning—without turning it into a clutter trap.
Start With a Shed Reset That Feels Manageable

Before you add anything, clear enough space to move around without stepping over bags of soil. You don’t have to empty the entire shed in one day. A realistic approach is to pick one corner as your “garden zone” and work outward.
Pull everything off the floor first. That single move instantly changes how usable the shed feels, and it sets you up for better garden shed plans later. Sort items into three piles: keep (used last season), relocate (belongs elsewhere), and let go (broken, duplicates, mystery items you never reach for). If you’re budget-aware, keep a “repair later” bin, but limit it to one small tote so it doesn’t become a forever project.
Wipe down surfaces, check for pests, and look for water entry points near the door or roof line. A clean baseline makes every small upgrade feel more intentional—especially if your shed is also storing bikes, kids’ outdoor toys, or pet gear.
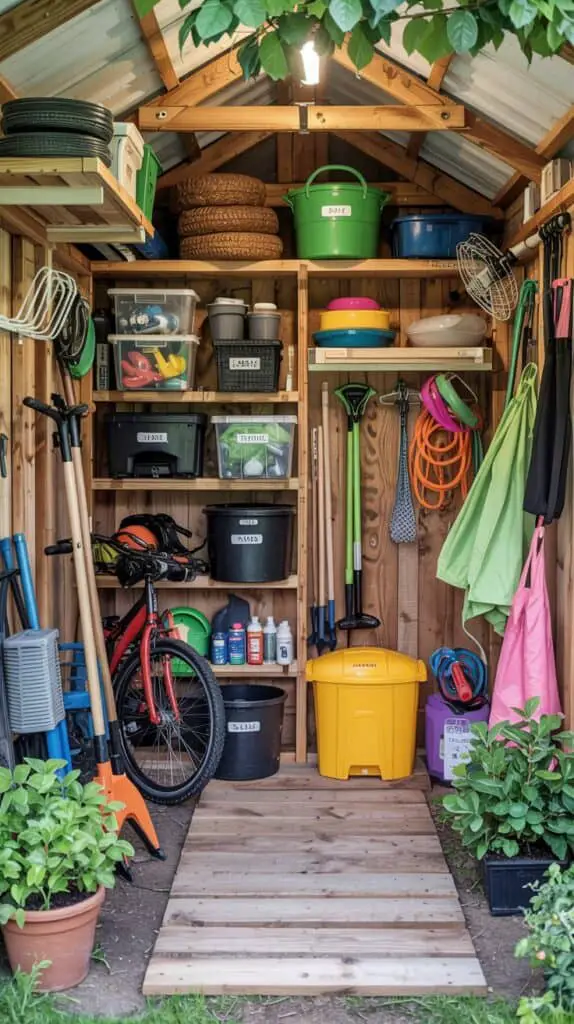
Create a Simple Layout: Door Zone, Work Zone, Storage Zone
Most garden shed interiors feel frustrating because everything is stored like a pile, not a system. A quick way to fix that is to assign zones based on how you actually move.
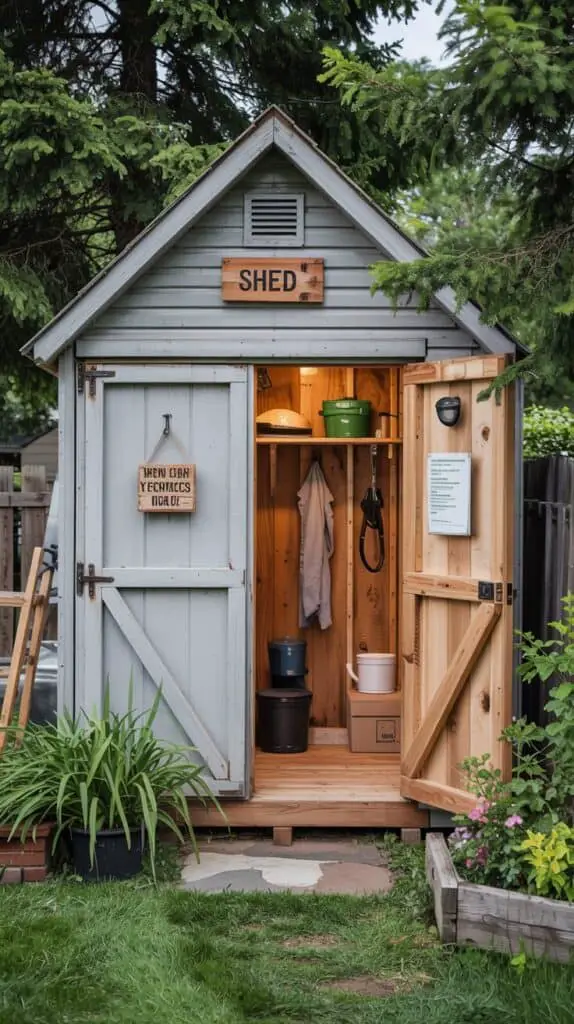
The door zone is for the messy, quick-grab stuff: boots, gloves, kneeling pad, hand trowel, dog leash, small watering can. Hang a few hooks or use a removable over-the-door rack if you’re trying to stay renter-friendly.
The work zone is your potting or prep surface. Even if it’s just a small fold-down table or a sturdy shelf, this is where you can open seed packets, fill pots, and stage transplants. Keep it close to a light source if possible.
The storage zone is for everything else: long tools, soil, amendments, extra pots, watering gear, and seasonal items. When you walk into the shed, you should be able to reach your top five spring tools without shifting a single box. That’s the whole “command center” idea in one sentence.
This layout also makes garden shed interiors feel calmer because you’re not mixing clean planning supplies with muddy tools.
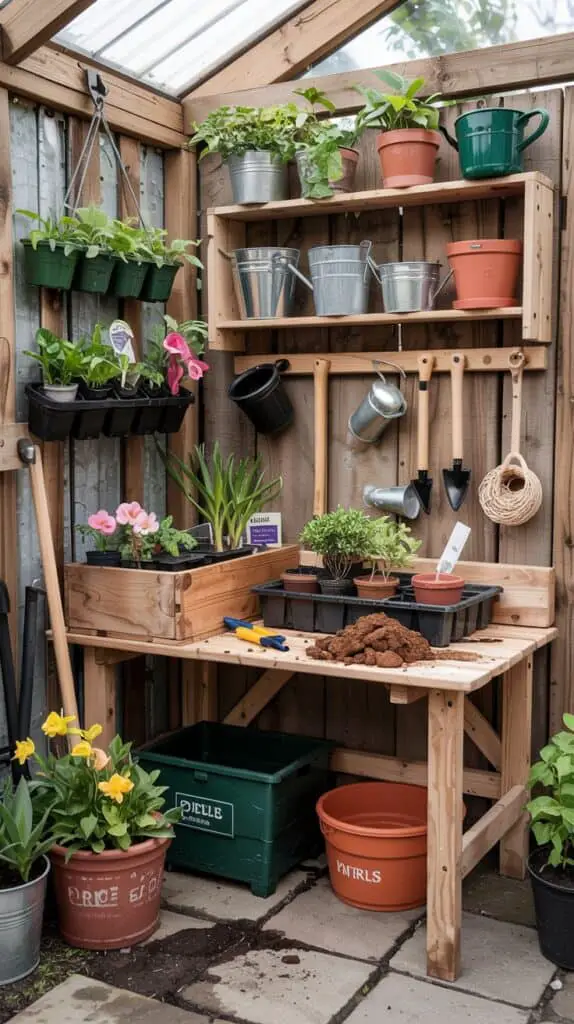
Build a Potting Station That Doesn’t Become a Clutter Magnet
Potting shed interior ideas get Pinterest-famous for a reason: a dedicated spot for potting is genuinely helpful in spring. But in real life, potting stations become cluttered if they’re too precious or too small.
Aim for three things:
A work surface you can wipe down, storage for the basics, and a place to shake off dirt.
A budget-friendly potting bench can be as simple as a sturdy table, an old desk, or a wall-mounted fold-down surface. If you’re in a rental, consider a freestanding shelf unit with a flat top so you aren’t drilling into studs. Add a plastic boot tray or a shallow bin under the work area to catch spilled soil and keep cleanup easy.
Keep your potting supplies in one tote or one drawer set: seed-starting mix, labels, pencil, snips, twine, and a small hand brush. If you have kids helping, add a second small kit with “kid-safe” tools so they don’t dig through your entire system.
The goal is a potting station that stays usable all season—not a surface that disappears under random stuff by week two.
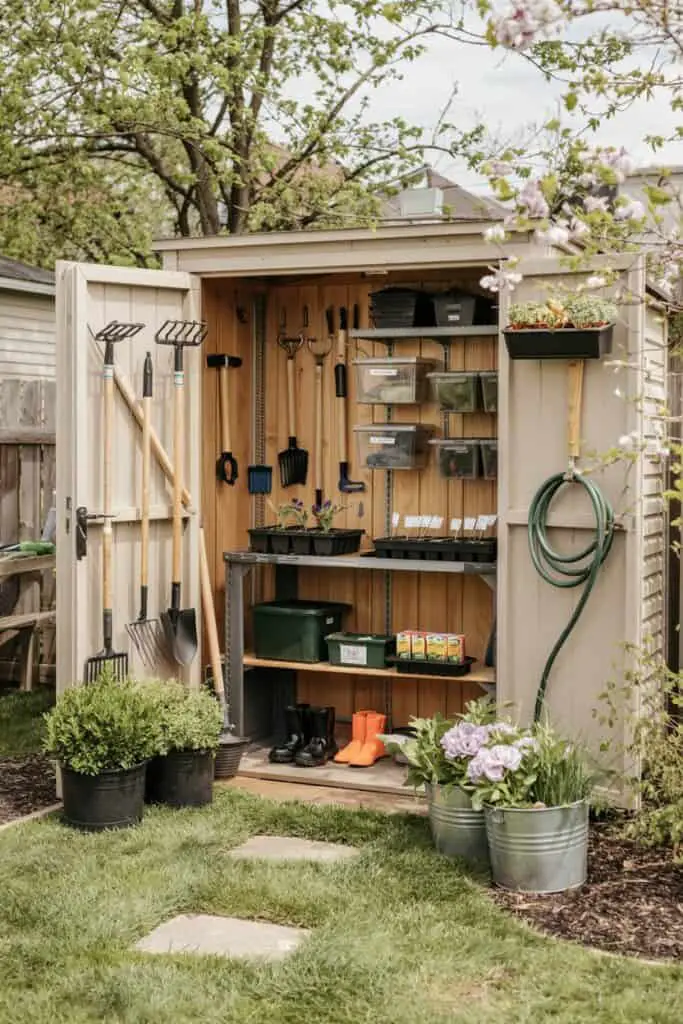
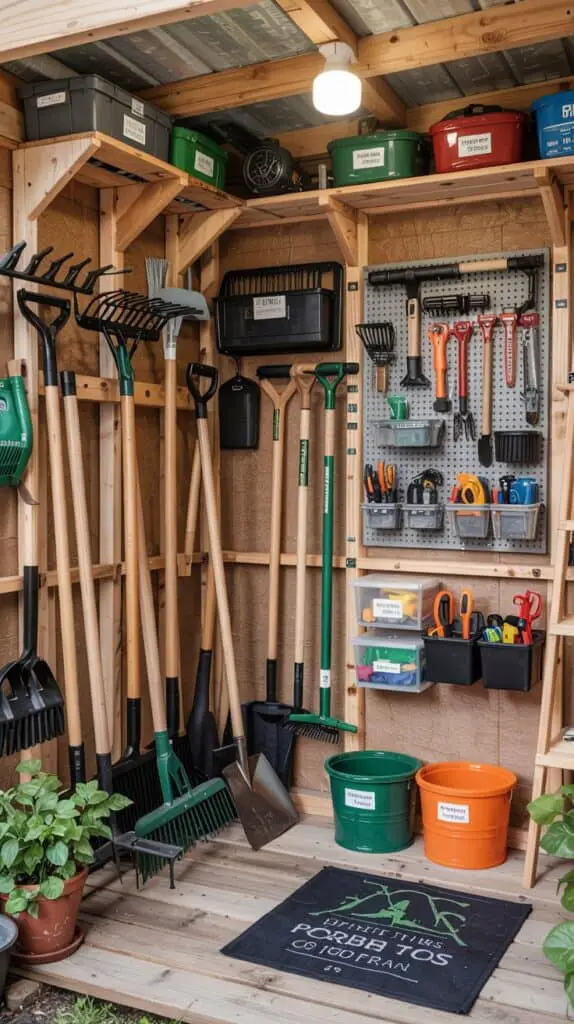
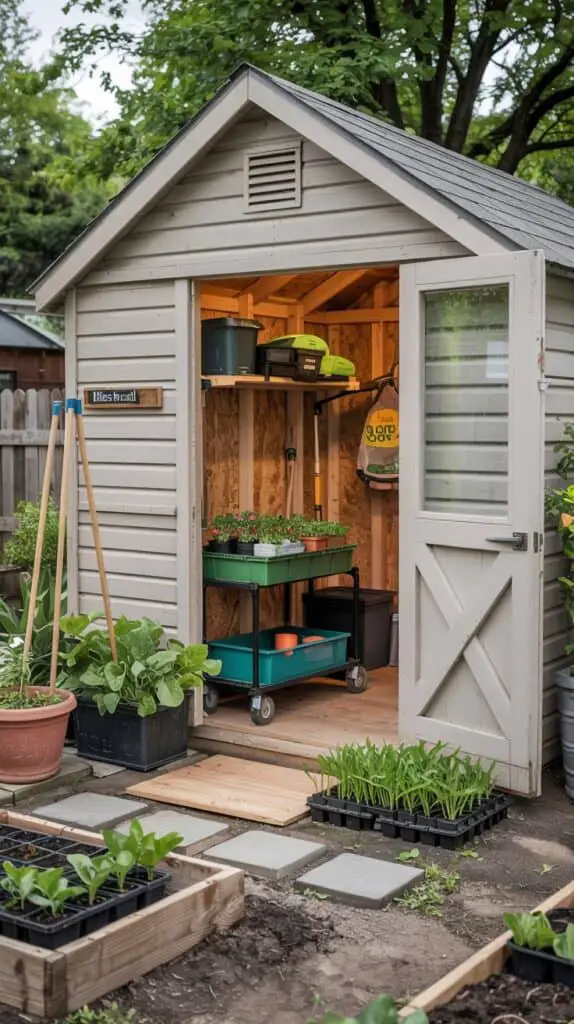
Make Tool Storage Vertical So the Floor Stays Clear
If you want your garden shed to feel like a command center, the floor needs to stay mostly open. Vertical storage is the biggest shift you can make without buying anything fancy.
Use wall space for long-handled tools: shovel, rake, hoe, leaf rake, broom. A simple row of hooks, a basic wall rack, or even a sturdy pallet leaned and secured can work. If you’re avoiding permanent changes, look for freestanding tool stands or tall corner racks.
For hand tools, think “visible and grouped.” A small pegboard, a magnetic strip, or a hanging fabric organizer makes it much easier to put things back. If you don’t want to commit to pegboard, a clear bin with compartments can work—just label it and keep it at eye level.
This is one of those outdoor shed ideas that looks nice and functions better immediately. It also helps families because kids can learn where things go, and it reduces the “where did the pruners go” situation.
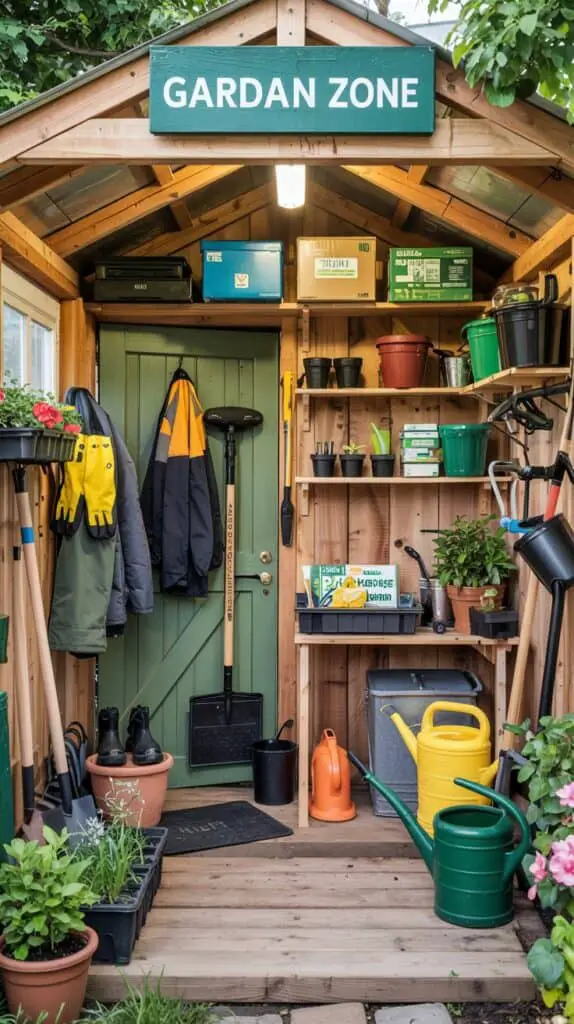
Add a Planning Spot for Seeds, Notes, and a Weekly Garden List
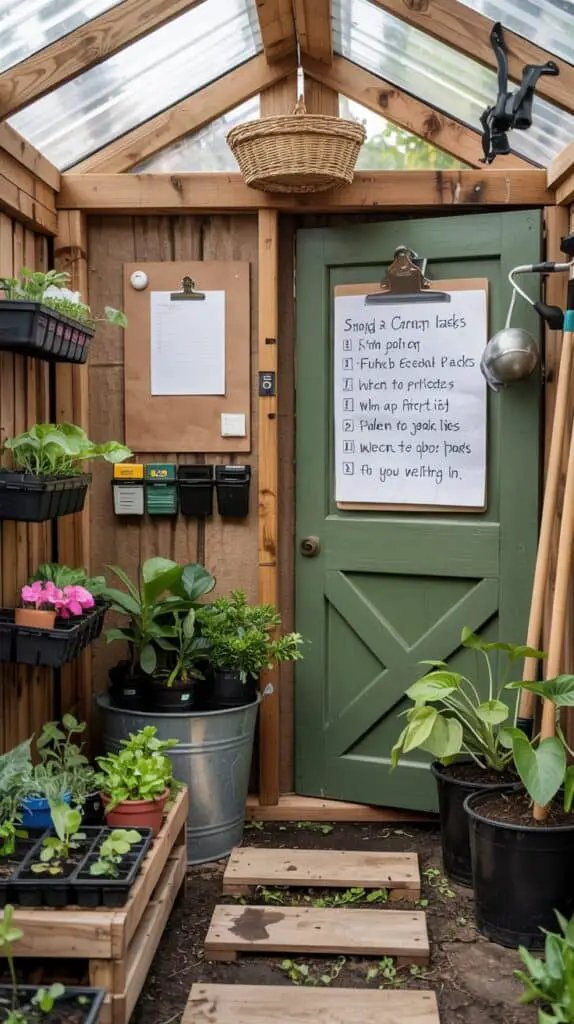
A command center isn’t just storage—it’s decision-making. Spring is full of small timing tasks: when to harden off seedlings, when to fertilize, when to water new beds, when to protect plants from a cold snap. Having a place to track it saves mental energy.
Keep a small planning area inside the shed: a clipboard, a simple notebook, or a wall-mounted folder for seed packets and plant tags. If the shed is damp, store paper supplies in a lidded plastic bin.
A small whiteboard or chalkboard can work if you’ll actually look at it. Keep it simple: three current tasks, what needs watering, and what you’re waiting on. If you prefer paper, tape a weekly checklist to the inside of the door so you see it every time you walk in.
This is especially helpful for beginners because it reduces overwhelm. It’s also helpful for pet owners and families because garden tasks can get interrupted—having your plan visible makes it easy to pick back up.
Set Up a “In and Out” Watering System That Fits Your Yard
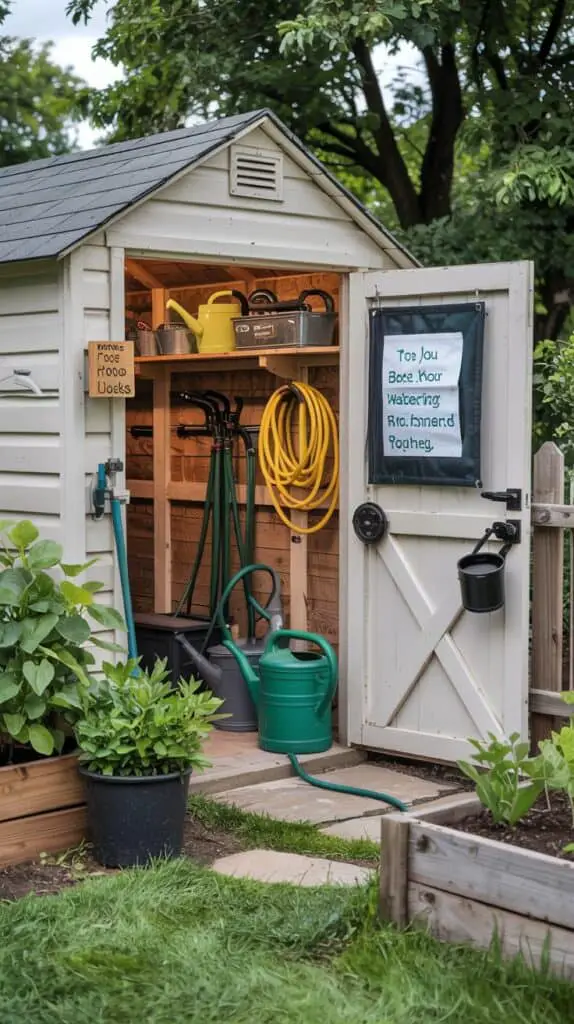
Watering is where shed setup can either support you or slow you down. If you’re constantly dragging a hose from the front of the house or carrying watering cans through the kitchen, you’ll garden less. The shed can help.
Store watering items near the door: hose sprayer, gloves, small watering can, and any drip irrigation parts. If you have space outside, consider a hose hook near the shed door so the hose lives closer to the garden beds. If you can’t add a spigot near the shed, even keeping hose accessories in one labeled bin makes setup quicker.
For raised beds, keep a dedicated bed-watering plan. It can be as simple as a note that says: “New transplants: daily check. Established beds: deep water 2x/week.” When your tools and plan live together, you make better choices without thinking so hard.
This is one of the most practical shed ideas backyard gardeners can implement because it changes your routine, not just your storage.
Connect the Shed to Raised Beds With a Small Staging Area
If your intent is to use the shed as a spring hub, it helps to create a “staging” space right outside the door. This is where you place seedlings to harden off, set down harvested greens, or line up pots before planting.
You don’t need a patio. You just need a stable surface. A few pavers, a gravel pad, or even a simple outdoor mat can define the space and reduce mud tracking into the shed. If you have pets, this also helps keep them from stepping directly into newly potted trays.
Keep a small rolling cart or a plastic crate nearby to carry items to the beds. If your yard sheds are farther from the garden, this is even more useful. The staging area becomes the bridge between planning and doing.
If you’re thinking through garden shed exterior ideas, this is a good place to focus—because improving the area around the door often makes the shed feel “designed,” even if the interior is simple.
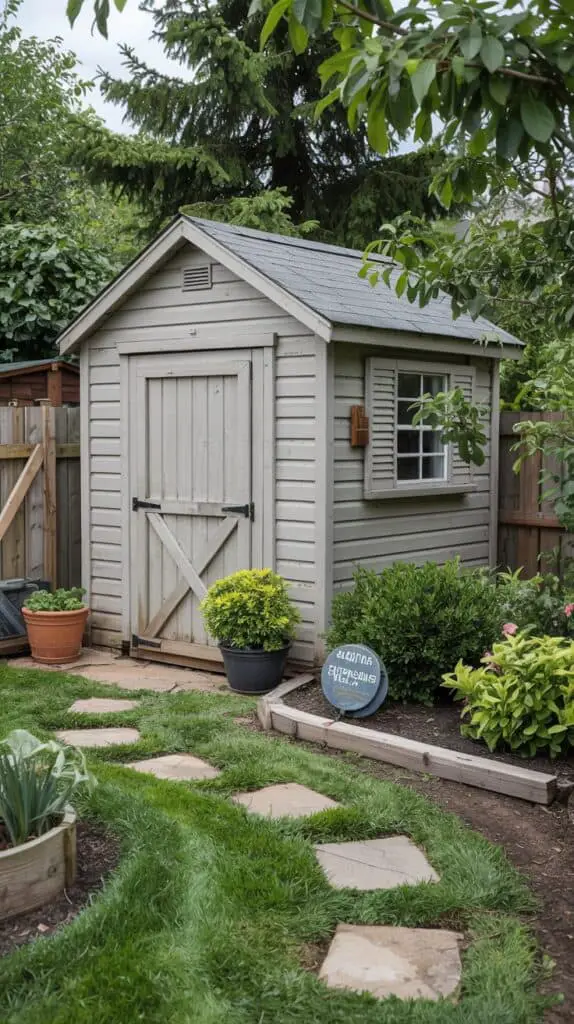
Use Shed Landscaping to Make the Shed Feel Like Part of the Garden
Shed landscaping isn’t just decorative. When the shed feels integrated with your garden, you naturally use it more. It becomes a destination instead of a storage unit you avoid.
Start with the basics: clear a path. If you’re stepping through tall grass to reach the door, you’ll procrastinate. Add stepping stones, mulch, or a simple mowed strip that stays consistent.
Then add one small “anchor” planting near the shed: a tough perennial, a big pot, or a simple trellis with something lightweight. If you’re a renter or don’t want to commit to digging, use containers. A pair of large pots by the door can make even basic garden buildings feel welcoming.
Also consider practical landscaping: keep the area around the shed free of debris so pests are less likely to nest. Trim back shrubs so airflow stays good, which helps prevent dampness inside.
If you want garden shed exterior ideas that don’t cost much, this is one of the most noticeable upgrades: clean edges, a defined path, and one intentional plant moment.
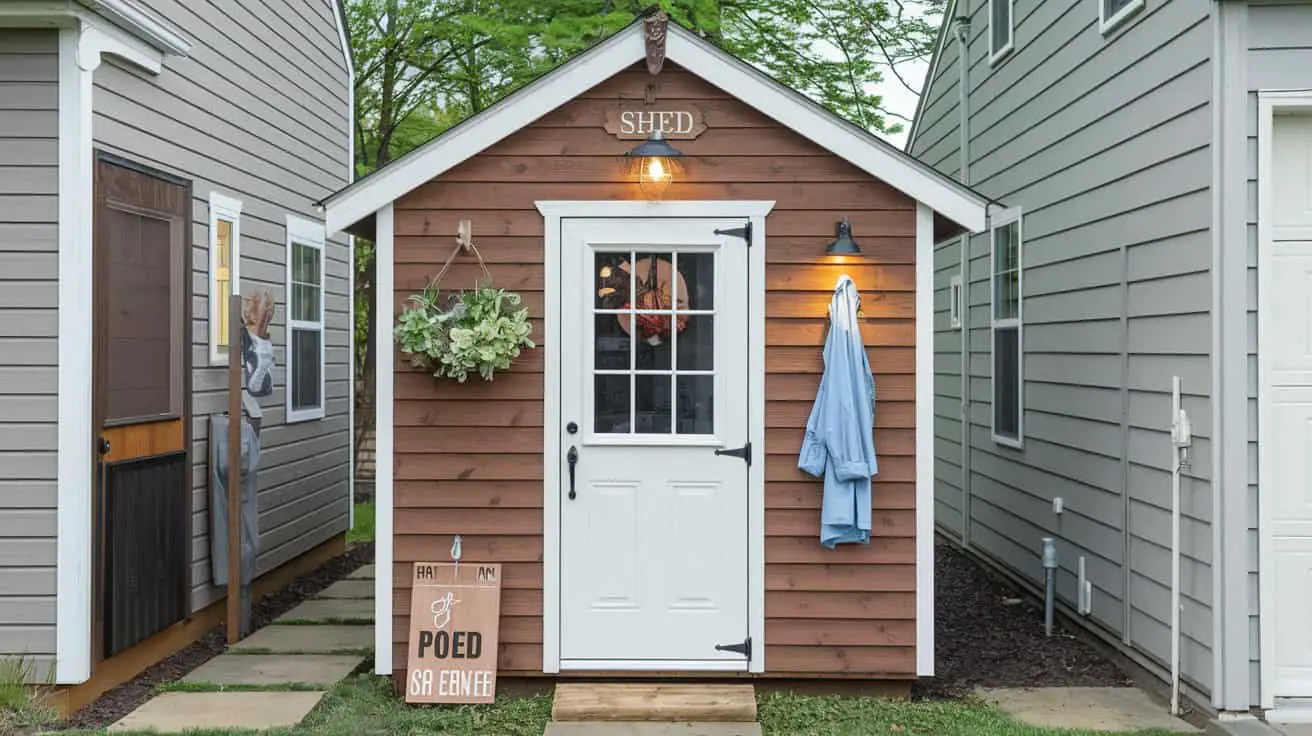
Refresh the Exterior With Small, High-Impact Changes
You don’t have to rebuild your shed to make it feel like a command center. Small exterior updates can shift the whole vibe and make it feel like a place you enjoy using.
A fresh coat of paint or stain is an obvious one, but it’s not always renter-friendly. If paint isn’t possible, focus on details: swap in a cleaner door handle, add a simple solar light near the entrance, or hang a weatherproof hook for a hat or apron.
If your shed door sticks, fix that first—nothing kills motivation like wrestling with a swollen door frame in early spring. Check the door sweep too, and add basic weather stripping if drafts and bugs are an issue.
Even a simple “shed sign” or a small number plaque can make it feel cared for, which makes you more likely to keep it organized. It’s a psychological trick, but it works.
These kinds of garden shed exterior ideas are about making the shed feel like a working part of your home, not leftover yard storage.
Make Room for Multi-Use Storage Without Losing the Garden Focus
Many people need their shed for more than gardening: bikes, sports gear, patio cushions, pet supplies, kids’ outdoor toys. The trick is to keep the garden shed zone intact even when the rest of the space gets busy.
Use labeled bins for non-garden items and stack them in one consistent area. Reserve one wall or one corner for gardening only. If your shed is tiny, that might mean one shelf for garden supplies, but keep it sacred. You don’t want seed-starting supplies buried behind pool noodles.
If you share the shed with family members, consider a simple “return zone” bin: anything left out gets tossed in there, and once a week you sort it back into proper homes. This keeps your command center functional without expecting everyone to be naturally organized.
This is where a lot of DIY garden shed improvements quietly succeed: not by making everything beautiful, but by making it easy to maintain.
Keep It Renter-Friendly With Removable, Low-Commitment Upgrades

Not everyone can drill into shed walls or build permanent fixtures, and that’s fine. You can still create a great spring setup with removable solutions.
Use tension rods for lightweight storage, freestanding shelves, rolling carts, and over-the-door organizers. Choose hooks that attach with adhesive strips if the surface allows, or use a pegboard that leans on a workbench instead of being mounted.
For planning supplies, use a lidded bin that you bring in during storms. For tool organization, try a portable tool caddy you can carry to the beds.
If you’re in a rental where the shed is shared or not fully weatherproof, focus on portable “kits”: a potting kit, a pruning kit, a bed-maintenance kit. Store each kit in a labeled tote so you can grab what you need and avoid rummaging.
These renter-friendly approaches still fit the larger goal: making the shed a working command center, not a fragile display.
Choose One “Signature” Upgrade From Garden Shed Plans You Actually Can Finish

It’s easy to get excited and start six shed projects at once. The best command centers come from finishing one or two upgrades that change your daily use.
Pick one signature upgrade based on what frustrates you most:
If you lose tools: build a simple wall rack system.
If potting is messy: create a potting station with soil containment.
If you forget tasks: set up a planning spot on the door.
If you avoid the shed because it feels dreary: improve lighting and the path.
There are endless garden shed plans online, but the right plan is the one that fits your budget, your time, and the reality of your yard. A small, finished improvement beats a half-built overhaul every time—especially when spring is already busy.
Conclusion
Turning a garden shed into a spring garden command center isn’t about making it perfect. It’s about making it easy to start: tools you can reach, a surface for potting, a simple system for planning, and a shed exterior that feels like part of the garden instead of an afterthought. With a few practical changes—many of them renter-friendly—you can make your yard sheds work harder for you and make spring gardening feel calmer, cleaner, and a lot more doable.