

If your child loves tiny woodland characters, soft textures, or collecting treasures from nature, pine cone gnomes are one of the sweetest (and simplest!) crafts you can make together. They’re adorable, they’re calming to create, and honestly… they’re the kind of project adults end up enjoying just as much as the kids.
What makes this craft perfect for quiet afternoons is how hands-on and sensory-friendly it is. The mix of crunchy pine cones, soft felt hats, and smooth wooden beads feels soothing to work with. And because most of the materials come from nature, the whole project has a gentle, grounding energy. You can head outside for a short nature walk, gather supplies, then come back in to make a little gnome village—it feels like a full experience, not just a craft.
Whether you’re a parent trying to slow down weekend afternoons or a teacher setting up a calming woodland-themed station for your classroom, these tiny gnomes are simple enough for kids to make independently and cute enough to proudly display. Here’s how to create your own pine cone gnome collection, plus some fun ideas for arranging them into magical mini worlds.
Gather Your Nature Finds & Simple Craft Supplies
One of the best parts of pine cone gnome crafting is how few materials you actually need. The base of each gnome is just a pine cone, and the rest can be found in a small craft kit or outdoors.
What you’ll need:
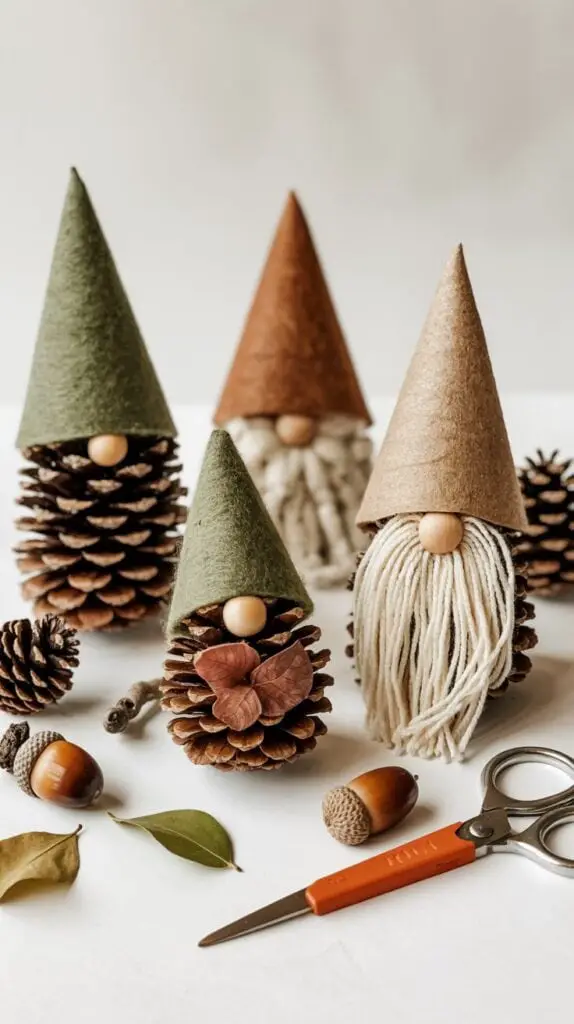
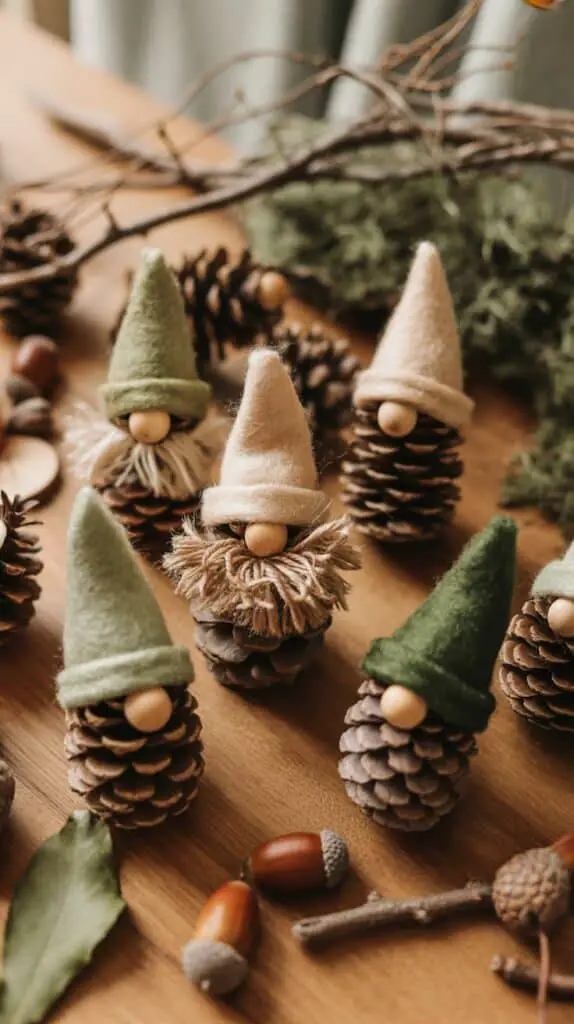
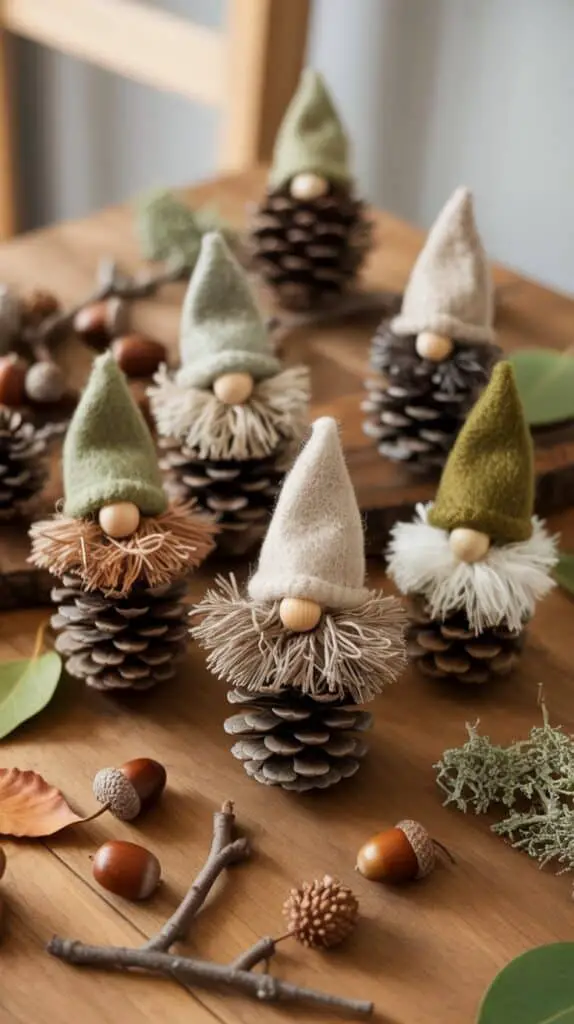
• Pine cones (different sizes make the gnomes more fun)
• Wooden beads for heads
• Felt in earthy colors for hats and scarves
• White or cream yarn for beards
• Acorns, small sticks, leaves, or seed pods for decoration
• Hot glue gun or tacky glue
• Scissors
Color palette ideas:
• Deep greens, browns, and burnt orange for a woodland look
• White + beige + pine green for Nordic forest gnomes
• Soft blush, cream, and sage for a gentle, fairy-forest aesthetic
Let kids choose their color palette—it gives them a calming sense of control over the design.
How Kids Can Build Their Gnomes Step-by-Step
These steps are intentionally simple so that children as young as preschool age can participate with minimal help.
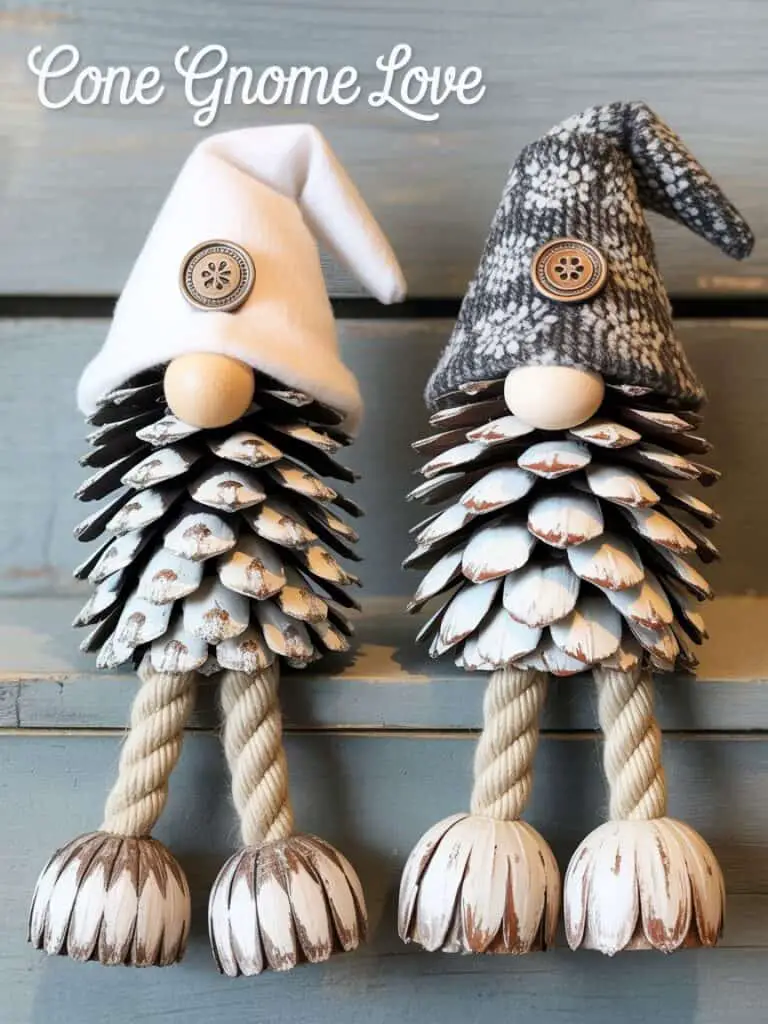
- Choose a pine coneLet kids select their favorite shape. Round pine cones give the gnome a stout, cozy look, while taller ones make lanky gnomes.
- Glue on the wooden beadThis bead becomes the face. Kids love watching the character come to life in this step.
- Make a tiny felt hatCut a triangle of felt, roll it into a cone shape, and glue the edge.Encourage kids to choose their favorite color—it helps them express personality.
- Add a soft yarn beardTrim a small bunch of yarn strands and glue them under the wooden bead. Fluff gently.
- Decorate with nature treasuresAcorn hats, leaf capes, tiny twig walking sticks—this is where the craft becomes magical.
- Let the gnome dryPlace them on a shelf so they can “rest in the forest” while the glue sets.
This process is slow, quiet, and engaging—perfect for tired afternoons or sensory-friendly classroom corners.
Create a Calm Woodland Scene for Display
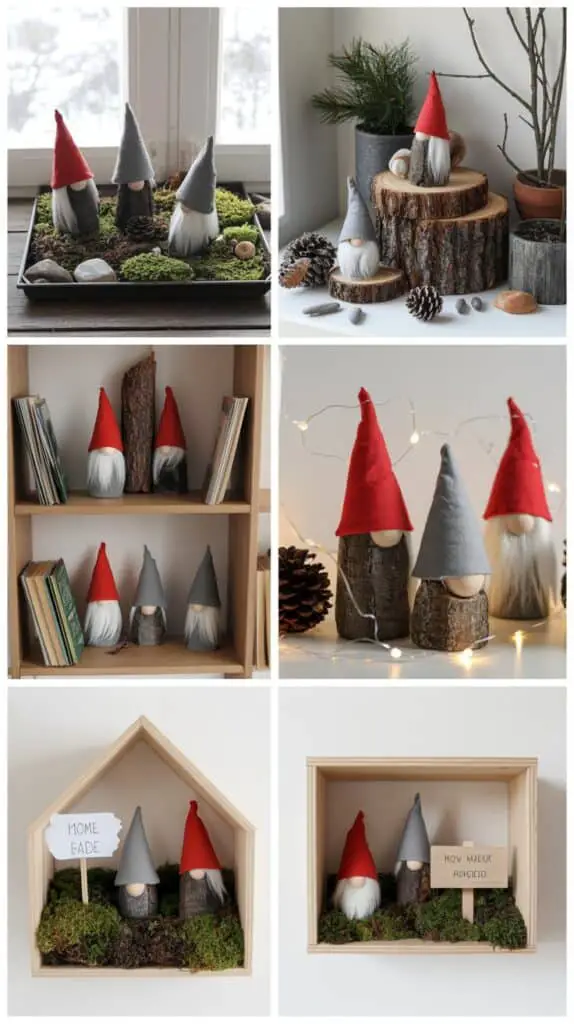
The finished gnomes are cute on their own, but arranging them into tiny worlds turns the project into something extra special.
Here are simple display ideas:
• Windowsill Woodland: Arrange gnomes on a tray with moss, branches, and little pebbles.
• Classroom Nature Table: Add pine cones, bark, and seed pods to create a fall-themed mini forest.
• Bookshelf Village: Use stacked books as “mountains” and place gnomes around them.
• Holiday Gnome Parade: Add a few twinkle lights and let the gnomes become a soft winter decoration.
• Terrarium-Style Scene: Use a shallow wooden box filled with faux moss and tiny handmade signs.
Kids love changing the scenes each day—it encourages storytelling, calm imaginative play, and gentle hands-on interaction.
Encourage Kids to Personalize Their Gnomes
Every tiny gnome can have its own personality. Let kids:
• draw little closed eyes or rosy cheeks
• add tiny scarves or backpacks
• glue on a mini felt heart
• use different hat shapes or beard styles
Personalizing their gnomes boosts creativity while keeping the project soothing instead of overwhelming.
Why This Craft Is So Calming for Kids
Pine cone gnomes combine three elements that help children regulate and feel grounded:
• Nature textures: rough cones, smooth beads, soft felt
• Repetitive steps: cut, roll, glue, fluff
• Quiet storytelling: kids imagine the gnome’s name, home, job, or adventure
This craft naturally slows everyone down. Adults often find the process therapeutic too.
Final Thoughts
Woodland pine cone gnomes are one of those crafts that kids remember long after they’ve made them. They’re simple, tactile, nature-connected, and endlessly charming. Whether you’re creating a whole forest family or just one tiny gnome for your desk, this project brings a bit of woodland magic into your day.